- Get free quotation
- 0455554422
- sina@electrisina.com.au

Bathroom downlight installation

2023 Outdoor & Indoor Lighting Trends
2023-09-15
Home Electrical Renovation Service in Sydney
2023-09-25Bathroom downlight installation
bathroom downlight installation
.Bathroom downlight installation is the main point of this article about Electrisina services. If you are looking for installing downlights in bathroom, just call us
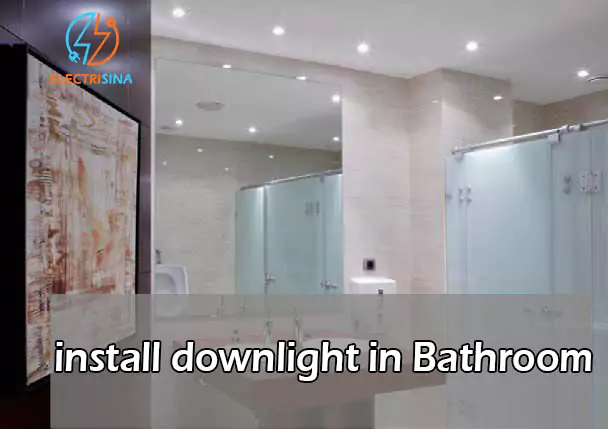
Introduction of installing downlights in bathroom
Installing downlights in a bathroom can be a great way to improve lighting and create a modern, sleek look. However, it’s important to note that electrical work can be dangerous if not done correctly. If you’re not comfortable or experienced with electrical work, it’s best to hire a licensed electrician to perform the installation. Below are general steps for installing bathroom downlights:
Materials and Tools You’ll Need to install downlights in bathroom
- Downlights (choose fixtures that are rated for bathroom use).
- Wiring (usually 14/2 or 12/2 electrical cable).
- Wire nuts.
- Electrical junction box (if not already in place).
- Wire stripper.
- Voltage tester.
- Drywall saw (if you need to create holes for the lights).
- Measuring tape.
install downlight shower
Installation Steps for downlight at bathroom
First step of Installing downlights in bathroom is Plan and Layout:
- Determine the location of the downlights in your bathroom. Consider the room’s layout and where you need the most light.
- Measure and mark the locations for the lights on the ceiling. Ensure they are evenly spaced and avoid placing them too close to any water sources.
second step of Installing downlights in bathroom is Turn Off the Power:
- Locate the circuit breaker or fuse box for the bathroom and turn off the power to the lighting circuit you’ll be working on. Use a voltage tester to ensure there’s no electricity flowing to the wires.
Third step of Installing downlights in bathroom is Prepare the Wiring:
- If you’re connecting the downlights to an existing circuit, you may need to run new electrical cable from the existing junction box to the locations of the new lights. Consult your local electrical code for wire type and size requirements.
- Strip the ends of the electrical wires to expose about 1/2 inch of copper.
Fourth step of Installing downlights in bathroom is Cut Holes for the Downlights:
- Use a drywall saw to cut holes in the ceiling where you marked for the downlights. Follow the manufacturer’s instructions for the size of the holes needed for your specific fixtures.
Fifth step of Installing downlights in bathroom is Mount Junction Boxes (if needed):
- If there are no existing electrical junction boxes at the installation locations, install them according to local electrical codes.
Sixth step of Installing downlights in bathroom is Install the Downlights:
- Follow the manufacturer’s instructions to secure the downlights in the holes you’ve cut. Usually, there are spring clips or mounting brackets to hold the fixtures in place.
Seventh step of Installing downlights in bathroom is Connect the Wiring:
- Connect the wires from the downlights to the electrical wires from the junction box, following the manufacturer’s instructions.
- Use wire nuts to secure the connections, making sure they are tight.

bathroom downlight installation
Eighth step of Installing downlights in bathroom is Test the Lights:
- Turn the power back on at the circuit breaker or fuse box.
- Test each downlight to ensure it’s working correctly.
Ninth step of Installing downlights in bathroom is Install Trim and Covers:
- Most downlights come with trim or covers. Install these as per the manufacturer’s instructions to finish the installation.
Thenth step of Installing downlights in bathroom is Patch and Paint (if necessary):
- If you had to cut holes in the ceiling, patch and paint to cover the openings and make the installation look seamless.
related article: 2023 Outdoor & Indoor Lighting Trends
Downlight in shower
Installing downlights in a shower area can provide good illumination and enhance the aesthetics of your bathroom. However, there are specific considerations and safety measures you must follow when installing lights in a shower to ensure they are safe and waterproof. Here are the steps for installing downlights in a shower:
Materials and Tools You’ll Need to install downlight in shower
- Waterproof or wet-rated recessed downlights.
- Appropriate wiring and electrical connections.
- Waterproof junction boxes.
- Gasket or silicone sealant.
- Wire stripper.
- Voltage tester.
- Measuring tape.

Steps of installing downlight in shower:
First step of Installing downlights in shower is Plan and Layout:
- Determine the location of the downlights in the shower area. Make sure they are strategically placed to provide even lighting and avoid shadows.
- Ensure that the fixtures you choose are specifically rated for wet or damp locations. Waterproof or wet-rated fixtures are crucial for safety in wet environments like showers.
Second step of Installing downlights in shower is Turn Off the Power:
- Locate the circuit breaker or fuse box for the bathroom and turn off the power to the lighting circuit you’ll be working on. Verify that there’s no electricity running to the wires using a voltage tester.
Third step of Installing downlights in shower is Prepare the Wiring:
- Plan your wiring carefully. You may need to run new electrical cable from an existing electrical source to the shower area, or you can connect to an existing circuit if it’s appropriately rated.
- Strip the ends of the electrical wires to expose about 1/2 inch of copper.
Fourth step of Installing downlights in shower is Cut Holes for the Downlights:
- Use a waterproof or wet-rated junction box as the electrical enclosure. Cut holes in the ceiling or wall where you want to install the downlights. Ensure that these holes are appropriately sized for your chosen fixtures.
Fifth step of Installing downlights in shower is Install the Downlights:
- Install the waterproof junction boxes in the holes you’ve cut. These boxes are designed to protect the electrical connections from moisture.
- Follow the manufacturer’s instructions to secure the downlights into the junction boxes.
Sixth step of Installing downlights in shower is Connect the Wiring:
- Connect the wires from the downlights to the electrical wires in the waterproof junction boxes, following the manufacturer’s instructions.
- Seal the connections with gaskets or silicone sealant to make them waterproof.
Seventh step of Installing downlights in shower is Test the Lights:
- Turn the power back on at the circuit breaker or fuse box.
- Test each downlight to ensure it’s working correctly.
Eighth step of Installing downlights in shower is Apply Sealant Around the Fixtures:
- Use waterproof sealant or silicone caulk to create a watertight seal around the edges of the fixtures where they meet the ceiling or wall.
Final step of Installing downlights in shower is Final Inspection:
- Double-check all connections and seals to ensure they are secure and watertight.
Installing downlights in a shower area requires careful attention to safety and waterproofing to prevent electrical hazards and moisture damage. If you are not comfortable or experienced with electrical work, consider hiring a licensed electrician to perform the installation to ensure it meets all safety and building code requirements.
related topic : Electrical services for bathroom renovations
bathroom downlight installation
what downlights for bathroom
Choosing the right downlights for your bathroom involves considering several factors, including the bathroom’s size, style, and your specific lighting needs. Here are some considerations to help you select suitable downlights for your bathroom:
-
Bathroom Zone and IP Rating:
Bathrooms are divided into different zones based on their proximity to water sources and the risk of water exposure. Each zone has specific IP (Ingress Protection) rating requirements for light fixtures. Check your local building codes, but as a general guideline:
- Zone 0: Inside the bath or shower. Requires a minimum IP67 rating (submersible).
- Zone 1: Above the bath or shower up to a height of 2.25 meters. Requires a minimum IP65 rating (jetproof).
- Zone 2: Areas around the bath or shower up to 0.6 meters outside Zone 1. Requires a minimum IP44 rating (splashproof).
- Zone 3: Outside of Zones 0, 1, and 2. No specific IP rating requirements, but moisture-resistant fixtures are recommended.
-
Type of Downlights:
- Choose downlights that are specifically designed for bathroom use and have the appropriate IP rating for the installation zone. Look for “bathroom rated” or “wet-rated” downlights.
-
Lighting Style and Color Temperature:
- Consider the style and ambiance you want to create in your bathroom. Downlights are available in various designs, including adjustable, fixed, and recessed options.
- Select a color temperature for the lighting that suits your preferences. Warm white (2700K-3000K) provides a cozy and relaxing atmosphere, while cool white (4000K-5000K) offers a more energetic and vibrant feel.
related article: Best lounge room lighting
-
Brightness (Lumens):
- Determine the level of brightness you need in your bathroom. Larger bathrooms may require more powerful downlights, while smaller ones may need fewer or lower-wattage fixtures.
- As a reference, a typical bathroom might require a total of 700-800 lumens of light for general illumination.
-
Dimmability:
- If you want to create different lighting moods in your bathroom, consider dimmable downlights. Make sure your dimmer switch is compatible with the selected fixtures.
-
Energy Efficiency:
- Opt for LED downlights as they are energy-efficient, have a long lifespan, and produce minimal heat. They are also available in a wide range of styles and color temperatures.
-
Installation Location:
- Determine where you want to install the downlights. Common locations include the ceiling above the vanity mirror, above the shower or bathtub, or as general ambient lighting.
-
Style and Aesthetics:
- Choose downlights that complement your bathroom’s decor and style. They should blend seamlessly with the overall design.
-
Budget
- Consider your budget when selecting downlights. Prices can vary widely based on the brand, quality, and features of the fixtures.
-
Consult with a Professional:
- If you’re unsure about which downlights to choose or how to install them safely and in compliance with local codes, consult with a licensed electrician or lighting specialist.
Conclusion of installing downlights in bathroom
Remember that electrical work should be done in compliance with local building codes, and it’s always safest to hire a licensed electrician if you’re not confident in your abilities or unfamiliar with your local regulations. Safety should be the top priority when working with electricity.
when choosing downlights for your bathroom, prioritize safety by selecting fixtures with the appropriate IP rating for the installation zone. Additionally, consider the style, brightness, color temperature, and dimmability to create the desired ambiance in your bathroom space.
related article :
Best downlight for living room
Importance of standard downlights at home
Why should separate fan switch from light switch in bathroom?

1 Comment
[…] Related article: Bathroom downlight installation […]